Как я могу использовать NSTimer в Swift?
Я пробовал
var timer = NSTimer()
timer(timeInterval: 0.01, target: self, selector: update, userInfo: nil, repeats: false)
Но я получил сообщение об ошибке
'(timeInterval: $T1, target: ViewController, selector: () -> (), userInfo: NilType, repeats: Bool) -> $T6' is not identical to 'NSTimer'
-
1"Как я могу использовать NSTimer в Swift?" - так же, как вы используете его в Objective-C. Его API не изменился.The Paramagnetic Croissant
13 ответов
Это будет работать:
override func viewDidLoad() {
    super.viewDidLoad()
    // Swift block syntax (iOS 10+)
    let timer = Timer(timeInterval: 0.4, repeats: true) { _ in print("Done!") }
    // Swift >=3 selector syntax
    let timer = Timer.scheduledTimer(timeInterval: 0.4, target: self, selector: #selector(self.update), userInfo: nil, repeats: true)
    // Swift 2.2 selector syntax
    let timer = NSTimer.scheduledTimerWithTimeInterval(0.4, target: self, selector: #selector(MyClass.update), userInfo: nil, repeats: true)
    // Swift <2.2 selector syntax
    let timer = NSTimer.scheduledTimerWithTimeInterval(0.4, target: self, selector: "update", userInfo: nil, repeats: true)
}

// must be internal or public.
@objc func update() {
    // Something cool
}
Для Swift 4, метод, для которого вы хотите получить селектор, должен быть открыт для Objective-C, поэтому атрибут @objc должен быть добавлен в объявление метода.
-
2Я бы добавил, что класс с этими методами должен быть NSObject, в противном случае вы получите нераспознанную ошибку селектора
-
27Начиная с Xcode 6.1, мне приходилось добавлять «@objc» в заголовок функции следующим образом: «@objc func update () {». Без этого приложение вылетает при первом пожаре.
Повторное событие
Вы можете использовать таймер для выполнения действия несколько раз, как показано в следующем примере. Таймер вызывает метод обновления метки каждые полсекунды.
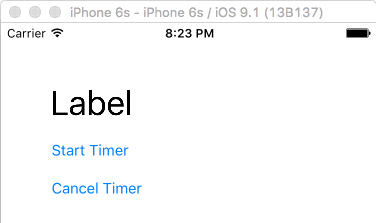
Вот код для этого:
import UIKit

class ViewController: UIViewController {

    var counter = 0
    var timer = Timer()

    @IBOutlet weak var label: UILabel!

    // start timer
    @IBAction func startTimerButtonTapped(sender: UIButton) {
        timer.invalidate() // just in case this button is tapped multiple times

        // start the timer
        timer = Timer.scheduledTimer(timeInterval: 0.5, target: self, selector: #selector(timerAction), userInfo: nil, repeats: true)
    }

    // stop timer
    @IBAction func cancelTimerButtonTapped(sender: UIButton) {
        timer.invalidate()
    }

    // called every time interval from the timer
    func timerAction() {
        counter += 1
        label.text = "\(counter)"
    }
}
Отложенное событие
Вы также можете использовать таймер для планирования одноразового события в течение некоторого времени в будущем. Основное отличие от вышеприведенного примера заключается в том, что вы используете repeats: false вместо true.
timer = Timer.scheduledTimer(timeInterval: 2.0, target: self, selector: #selector(delayedAction), userInfo: nil, repeats: false)
В приведенном выше примере вызывается метод с именем delayedAction две секунды после установки таймера. Он не повторяется, но вы все равно можете вызвать timer.invalidate() если вам нужно отменить событие до его появления.
Заметки
- Если есть вероятность запустить экземпляр таймера несколько раз, убедитесь, что вы сначала аннулируете экземпляр старого таймера. В противном случае вы теряете ссылку на таймер, и вы больше не можете его останавливать. (см. этот вопрос и ответы)
- Не используйте таймеры, когда они не нужны. См. Раздел " Таймеры" Руководства по энергоэффективности для приложений iOS.
связанные с
-
0Отличный ответ, все еще работает в Swift 4.2 Xcode 10.1.
-
1@raddevus, спасибо, что сообщили мне об этом. Я удалил старый комментарий Swift 3.
Обновлено до Swift 4, используя userInfo:
class TimerSample {

    var timer: Timer?

    func startTimer() {
        timer = Timer.scheduledTimer(timeInterval: 5.0,
                                     target: self,
                                     selector: #selector(eventWith(timer:)),
                                     userInfo: [ "foo" : "bar" ],
                                     repeats: true)
    }

    // Timer expects @objc selector
    @objc func eventWith(timer: Timer!) {
        let info = timer.userInfo as Any
        print(info)
    }

}
-
2Покажите рабочий пример, что означают «custom» и «data», если функция ожидает объект
NSTimer -
1Это действительно не имеет значения. Вы можете хранить все, что вам нужно, в словаре userInfo, в данном случае это произвольная пара ключ-значение.
Как и в iOS 10, также существует новый метод Timer factory на основе блоков, который более чист, чем при использовании селектора:
    _ = Timer.scheduledTimer(withTimeInterval: 5, repeats: false) { timer in
        label.isHidden = true
    }
-
0То, как вы это делаете, не лучше ли просто удалить
_ =и начать сTimer? -
1Вы можете опустить _ =, если вы отключите предупреждение о неиспользованном значении или если вам просто наплевать на предупреждения. Я не люблю проверять код с предупреждениями.
Swift 3, pre iOS 10
func schedule() {
    DispatchQueue.main.async {
      self.timer = Timer.scheduledTimer(timeInterval: 20, target: self,
                                   selector: #selector(self.timerDidFire(timer:)), userInfo: nil, repeats: false)
    }
  }

  @objc private func timerDidFire(timer: Timer) {
    print(timer)
  }
Swift 3, iOS 10 +
DispatchQueue.main.async {
      self.timer = Timer.scheduledTimer(withTimeInterval: 20, repeats: false) { timer in
        print(timer)
      }
    }
Примечания
- Он должен находиться в главной очереди
- Функция обратного вызова может быть общедоступной, частной,...
- Функция обратного вызова должна быть
@objc
-
1Насколько я понимаю, только обратный вызов таймера должен быть в главной очереди, и что следующее будет несколько более эффективным: self.timer = Timer.scheduledTimer (withTimeInterval: 20, repeat: false) {timer in DispatchQueue.main.async {print (таймер)}}
-
0Мой таймер не срабатывал от одного из моих объектов, и это сделало трюк :)
Обратите внимание:
var timer = NSTimer.scheduledTimerWithTimeInterval(0.01, target: self, selector: Selector("update"), userInfo: nil, repeats: true);
-
2Я уже пробовал это, но он говорит: «Не удалось найти перегрузку для« init », который принимает предоставленные аргументы»
-
0@midhun в быстром не имеет
;нет, это правильно или нет
Вам нужно будет использовать таймер вместо NSTimer в Swift 3.
Вот пример:
Timer.scheduledTimer(timeInterval: 1,
    target: self,
    selector: #selector(YourController.update),
    userInfo: nil,
    repeats: true)

// @objc selector expected for Timer
@objc func update() {
    // do what should happen when timer triggers an event
}
для быстрых 3 и Xcode 8.2 (приятно иметь блоки, но если вы компилируете для iOS9 И хотите userInfo):
...
        self.timer = Timer(fireAt: fire,
                           interval: deltaT,
                           target: self,
                           selector: #selector(timerCallBack(timer:)),
                           userInfo: ["custom":"data"],
                           repeats: true)

        RunLoop.main.add(self.timer!, forMode: RunLoopMode.commonModes)
        self.timer!.fire()
}

func timerCallBack(timer: Timer!){
        let info = timer.userInfo
        print(info)
    }
SimpleTimer (Swift 3.1)
Почему?
Это простой класс таймера в swift, который позволяет вам:
- Локальный таймер
- змеевидных
- Один вкладыш
- Использовать регулярные обратные вызовы
Использование:
SimpleTimer(interval: 3,repeats: true){print("tick")}.start()//Ticks every 3 secs
Код:
class SimpleTimer {/*<--was named Timer, but since swift 3, NSTimer is now Timer*/
    typealias Tick = ()->Void
    var timer:Timer?
    var interval:TimeInterval /*in seconds*/
    var repeats:Bool
    var tick:Tick

    init( interval:TimeInterval, repeats:Bool = false, onTick:@escaping Tick){
        self.interval = interval
        self.repeats = repeats
        self.tick = onTick
    }
    func start(){
        timer = Timer.scheduledTimer(timeInterval: interval, target: self, selector: #selector(update), userInfo: nil, repeats: true)//swift 3 upgrade
    }
    func stop(){
        if(timer != nil){timer!.invalidate()}
    }
    /**
     * This method must be in the public or scope
     */
    @objc func update() {
        tick()
    }
}
-
0Как тогда остановить таймер внутри этого блока при некоторых условиях?
-
0Просто сохраните ссылку в таймере в классе, затем просто вызовите стоп. Компилятор xcode сообщит вам, нужно ли ему бежать и т. Д.
timer = Timer.scheduledTimer(timeInterval: 1, target: self, selector: #selector(createEnemy), userInfo: nil, repeats: true)
И создать Fun по имени createEnemy
fund createEnemy ()
{
do anything ////
}
-
0Вы должны отформатировать код как код для удобства чтения
В Swift 3 что-то вроде этого с @objc:
func startTimerForResendingCode() {
    let timerIntervalForResendingCode = TimeInterval(60)
    Timer.scheduledTimer(timeInterval: timerIntervalForResendingCode,
                         target: self,
                         selector: #selector(timerEndedUp),
                         userInfo: nil,
                         repeats: false)
}


@objc func timerEndedUp() {
    output?.timerHasFinishedAndCodeMayBeResended()
}
Если вы запускаете метод таймера
let timer = Timer(timeInterval: 3, target: self, selector: #selector(update(_:)), userInfo: [key : value], repeats: false)

func update(_ timer : Timer) {

}
затем добавьте его в цикл, используя метод другого селектора, который не будет называться
RunLoop.main.add(timer!, forMode: .defaultRunLoopMode)
ПРИМЕЧАНИЕ. Если вы хотите, чтобы это повторялось, повторите повторение и сохраните ссылку на таймер, иначе метод обновления не будет вызываться.
Если вы используете этот метод.
Timer.scheduledTimer(timeInterval: seconds, target: self, selector: #selector(update(_:)), userInfo: nil, repeats: true)
сохраните ссылку для последующего использования, если повторы верны.
NSTimer был переименован в Timer в Swift 4.2. этот синтаксис будет работать в 4.2:
let timer = Timer.scheduledTimer(timeInterval: 1.0, target: self, selector: #selector(UIMenuController.update), userInfo: nil, repeats: true)
-
0Переименование произошло в Swift 3, и другие ответы уже сделали обновление ...
Ещё вопросы
- 1String.split, преобразование строк в int
- 1Автоматизировать установку ucbrowser
- 1Как получить текущий элемент в Dropdownlist для ASP.NET
- 1оператор if не работает с целочисленными значениями
- 0Скрипт Absolute Path удален после Grunt Build .. Нужно исправить
- 1Как отсортировать слова по частоте
- 0Независимые куки в разных папках
- 0Показать / скрыть без использования CSS
- 0Реализация класса List Ошибка выделения памяти с указателем
- 0Подождите, пока звук не закончится, чтобы использовать страницу
- 1Почему я нахожу дополнительные ссылочные объекты в связанном списке?
- 0Javascript не может разобрать строку JSON
- 0Как показать ошибки в окнах оповещений после нажатия кнопки отправки с помощью угловых JS?
- 0OpenCL 1.1 Undefined Reference с использованием оболочек C ++
- 0GetElementsByClassName - Perl?
- 1Как открыть разговор в WhatsApp на определенный номер с намерением
- 0Codeigniter возвращает false из моделей
- 1Не удается получить SQL-запрос для сохранения результатов в переменных
- 0Данные JSON из сервлета в jqGrid не отображаются
- 1Java: удаление компонента Runnable Canvas
- 0Предназначайтесь для всех следующих детей родного брата
- 0Простая карусель, которая обновляет свои кнопки навигации с количеством элементов контента
- 1всплывающее окно на веб-карте
- 1Обработка пользовательских сообщений об ошибках в веб-API
- 0Enum не был объявлен
- 1Потоки для медленных операций в приложении MVC
- 0Superscrollorama, TweenMax Включите анимацию и после этого возобновите прокрутку
- 0Необычное поведение кнопки возврата jquery mobile, phonegap / cordova
- 1как заставить ckeditor перестать удалять пустые div
- 0Мое изображение не загружается на мою таблицу базы данных
- 1Не удается изменить InnerHTML класса span?
- 0создать класс с помощью ввода из cin, полученного с помощью оператора >>
- 1Позвоните класс для рецептов Minecraft
- 1Таймер JavaScript для использования несколько раз на странице
- 0как управлять стилем HTML кода в Qprinter
- 1canvas.toDataURL () возвращает черное изображение, пытаясь изменить размер строки base64
- 1Как кодировать кнопку с различными эффектами при многократном нажатии
- 1Поместите текст внутри круга. d3.js
- 1Повторите тест на AssertionError
- 1Запускать программу, только если ввод состоит из одной буквы
- 1Используйте методы получения и установки класса Kotlin Model внутри Android Activity
- 1Как создать Android-виджет, используя реагировать родной?
- 0Не отображаются средние значения для пользователей с более чем одним экземпляром
- 1Использование Ienumerable.TakeWhile, но возвращает только один набор результатов
- 0Установка CSS для Cgridview в YII
- 1Regex для проверки заглавных букв или маленьких букв, если @ используется в начале
- 1Java - Защищенный метод недоступен из подкласса
- 0PHP Array Получить значение
- 0Путаница HTML-валидатора
- 0Как заставить JQuery работать после перезагрузки контента?
